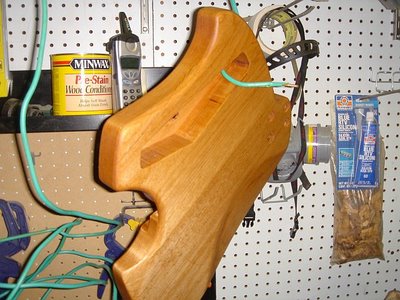
Danish Oil Guitar Finish Applied
With the final bit of routing complete on my guitar project, I turned to finishing the guitar. After researching the subject, I decided to go with a simple DIY solution – Watco Danish Oil.

Before starting the finish, I had a few small dents in the guitar body that I wanted to address. I used a heated soldering iron along with a damp cloth placed over the spot to raise the wood. That worked well and went quickly. Then I finished sanding with 150 grit.
Applying the Danish Oil was simple. I followed the instructions on the container to apply generously, rewetted any areas that dried and allowed that to sit for about 30 minutes. Then I reapplied, waited about 15 minutes and wiped dry. Finally, I let it dry overnight.
The next day, I applied one more coat and let it dry overnight as well.
Overall, I like the results. I like the color and the smooth feel. The finish dries in the wood so it should hold up fine to normal wear and tear. However, it isn’t a hard coat so its not intended to stand up to a lot of abuse. For those of you who are into relicing guitars, consider it pre-reliced. 🙂
The real advantage though is that it is easily reapplied and renewed when necessary. BTW – Danish Oil comes in a variety of shades. I chose the “natural” finish but as you can see, it definitely changed the color of the wood so test on scraps before applying. The end result is something of a butterscotch.
More on my first guitar project:
- Guitar Build – Control Cavity and Pickup Routes Complete
- Guitar Build – Belly Contour and Forearm Cut Complete
- Guitar Build – Neck and Steinberger Bridge in Place for First Test!
- Guitar Build – Neck Pocket Complete
- Guitar Build – Bridge and Neck Have Arrived
- Guitar Build – Guitar Body Flush Trimmed and Edges Rounded Over
- Cutting Out The Ergonomic Guitar
- Making The Ergonomic Guitar Template
- Project Guitar Topic Thread: First Project Attempt – Ergonomic Guitar