Guitar Control Cavity and Pickup Routes Done
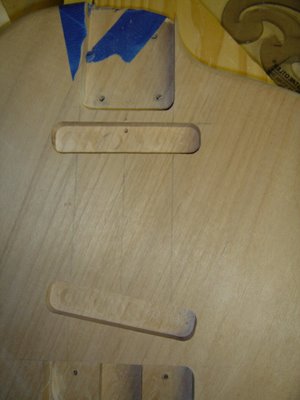
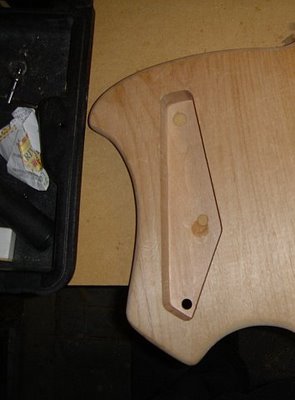
Continuing with my electric guitar project, I completed the pickup cavities and control cavity after deciding against the combination of rear routing and front routing that the original Klein guitar uses. I decided rear routing was preferable. I did a quick test fit of the controls and everything looked good.
For the pickup cavities, I made a pickup template out of MDF by forming a rectangle to the dimensions of the pickup. I took advantage of the fact that the router bit can’t get into the corners which results in radiused corners for the pickup cavities. There was no need to complicate the template by trying to radius its corners as well.

Before starting the control cavity, I chose the locations of the controls and used Forstner bits to drill through the top of the guitar body and out the back. The holes then provided a point of reference for the location of the control cavity. I made a control cavity template by gluing up scrap pieces of MDF into the shape I wanted. Once again, I took advantage of the fact that the router bit would leave radiused corners.

The guitar body with all of its routing complete now weighs a mere 3 lb 2 oz. Next up is applying the Danish oil finish.
More on my first guitar build:
- Belly Contour and Forearm Cut Complete
- Guitar Neck and Steinberger Bridge in Place for First Test!
- Neck Pocket Complete
- Guitar Bridge and Neck Have Arrived
- Guitar Body Flush Trimmed and Edges Rounded Over
- Guitar Body Cut Out
- Making The Ergonomic Guitar Template
- Project Guitar Topic Thread: First Project Attempt – Ergonomic Guitar
I don’t understand why you cut holes all the way through for the control cavity…
Hi Danny – thanks for stopping in and thanks for the comment. The holes would have been drilled through the top one way or the other in order to load the controls from the back. This is a rear routed guitar. They have to pass through the face of the guitar. It didn’t matter whether I did this before or after the control cavity – the effect is the same. By starting with the holes, I had them as a reference for positioning the control cavity since I wasn’t completely sure what form the cavity was going to take.
Hi there,
Just wondering, when you attached your pickups into the pickup cavities, did you screw them straight down into the wood? If not how did you mount them?
Thanks, Jon.
Hi Jonathon and welcome. I screwed them down directly into the wood with the screws passing through metal spacers to adjust for pick up height.
Hi there,
I know this is kinda a rookie question but, when you route out the pickup cavities; how do you feed the wires to the volume and tone knobs/control cavity. I’ve seen some people just route a straight path through the pickups to the control cavity and then apply laminate on top with only the pick ups routed out to cover the open path (as confusing as that sounds). I can’t tell by these pictures if that’s the technique you used; if not, how do you connect the pickups to the volume and control knobs.
I used a 12″ long drill bit to create the wire path to the control cavity. That’s a typical approach.
what kind of router are you using and how do you cut out the tunnels going from pickup cavity to pickup cavity to the control panel where the wires go?
I used the Dewalt router discussed here. It’s an excellent router kit.
The passages between pickup cavities are done with a 12″ long drill bit. Start at the base of the neck pocket and drill through.
Im a rookie at this and and building my own guitar online. and im wondering, what is the most common pickup route for an explorer is?
Thanks,
Lefty
The typical arrangement is a humbucker at the neck and one at the bridge.
Hello Rob,
How did you attached your template to the guitar for routing out the cavities? Also, how did you secure the body of the guitar while you did the routing?
Yes, I’m a total rookie, but I’d would like to tackle putting together a guitar kit, but adding some custom electronics (hence the need to route cavities).
What is the bare minimum/easiest/cheapest method to do what I asked above, as well?
Thanks…
Lance – Welcome to eLUTHERIE.org. I used a bunch of Irwin quick grip clamps to hold the pickup template in place while I routed it with my Dewalt router.
An alternative would be to simply make your template a bit oversized and used small screws to hold it directly in place on the guitar body. I didn’t use this method because I wasn’t painting the body so I didn’t want screw holes. Instead, I used Danish Oil for an easy finish.
To secure the body I clamped it down to the work surface. BTW – you can never have too many clamps.
Rob,
Thanks for the info… I’ve never used a router, so I wasn’t exactly sure what the “pros” would use to do the job right!
Glad to help Lance. Take a look at Woodworking with the Router: A Review. It’s a great book that will tell you everything you need to get started.